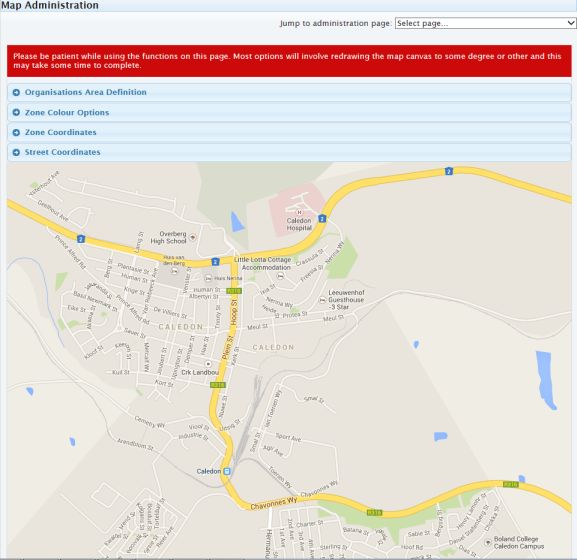
Overview
- The map administration serves 2 purposes;
- Displays the different zones on the contact page so a member can see both the area the organisation covers
and where their street sits in relation to the different zones
- To plot incidents on a zone/street basis - functionality to come.
There are 4 sections to the map administration, these are;
Click a section header above to view that section.
- Figure 1 - The map administration page
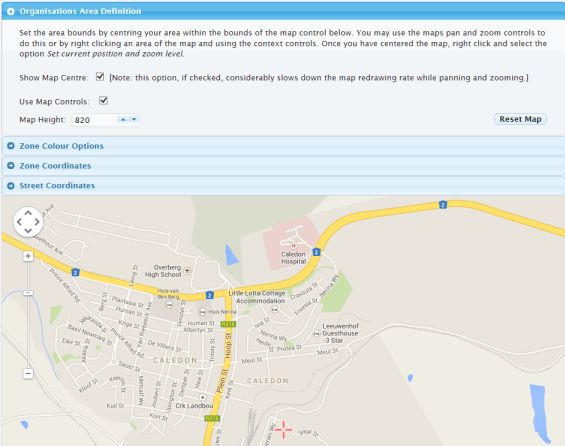
Organisations Area Definition
- Figure 2
-
The area definition allows you to centre the map over your organisations area and set the best zoom level for it.
It has 3 controls to help you do this;
- Show Map Centre
Showing the map centre place a red cross in the centre of the display area and which is useful when
dragging the map into position. You can see the cross in figure 2.
An alternative method if you know where you would like the map centre to be is to right click on the spot and
select the 'centre map here' option.
- Use Map Controls
The map controls allow you pan and zoom around the map.
You can also drag the map around by clicking and
holding down the left mouse button whilst over the map and dragging it around that way.
You can see the map controls in figure 2.
Another way to zoom in or out of the map is to right click on it and select the menu option you require.
- Map Height
In order to fit as much of the height of the map in as posible, set the height using this control. Changes take effect after
the spinner has stopped if using the mouse or as you type if using the keyboard.
Height is measured in pixels and the minimum height is 100 pixels.
-
IMPORTANT: When you have centred the map over your organisations area and set the required zoom level, right click
anywhere on the map and click the 'Set current position and zoom level' button.
Zone Colour Options
- The zone colour options allow you to fill in the zone with a could and add a label to that zone, see figure 3. below.
The various zone and label options are set out below.
- Figure 3
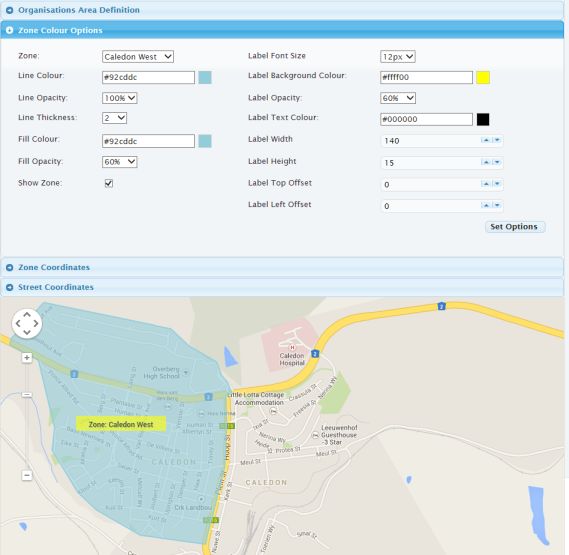
- Zone Options
- Line colour
The colour of the line around the boundary of the zone and may be the same colour as the zone of different.
- Line opacity
The opacity (see through property) of the line with 100 being totally opaque - the map beneath the line is
fully obscured.
- Line Thickness
The thickness of the line.
- Fill Colour
The actual colour of the zone area when mapped.
- Fill Opacity
The opacity (see through property) of the zone with 100 being totally opaque - the map beneath the zone is
fully obscured.
- Show Zone
If the zone has been mapped in the zone coordinates section below, checking this box shows the zone and line colouring and the label for that zone.
- Label Options
- Label Font Size
The size of the text in the label between 5 and 20 pixels.
- Label Background colour
The background colour of the label
- Label Opacity
The opacity (see through property) of the label with 100 being totally opaque - the map beneath the label is
fully obscured.
- Label Text Colour
The colour of the label text.
- Label Width
The physical width of the label.
- Label Height
The physical height of the label.
- Label Top Offset
The position of the top of the label in relation to the top of the map.
- Label Left Offset
The position of the left side of the label in relation to the left side of the map.
- When all properties above have been set, for each zone, click the set options button to save your changes.
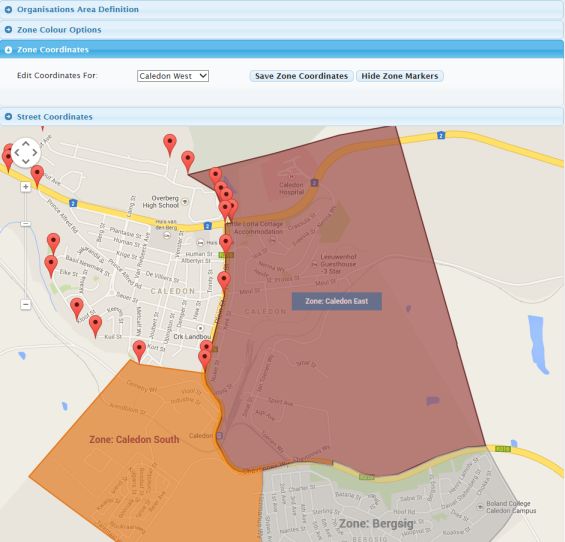
Zone Coordinates
- The zone coordinates section allows you to demarcate your zone or zones. This is done by clicking on positions on the map
around the edge of the zone or area. As each position is clicked, a marker is left in place to show you were you have mapped.
-
Notes
- It is very important that you click sequentially around the map. You cannot, for instance, create 2 positions and then place a
new marker between those positions as doing so will cause the map to draw incorrectly. It is best to start in one corner of
the zone/area and work around the zone/area until you get back to the beginning.
-
As you place a marker, if you find it is in the wrong place you may simply click and
hold down the mouse button while dragging it to it's new position. If you hover over a marker you will see it's position number with 'marker #0' being the first.
-
To delete a marker, click it and select delete this coordinate when the popup appears.
-
When placing markers, if you are following a road that has bends, place plenty of sequential markers to ensure the map is drawn in a
smooth pattern that follows the contour of the road, otherwise what tends to happen is that the line between two distantly spaced markers will be a
straight line and will in all liklihood cut across the road you are trying to map.
- Figure 4
-
To Setup the zone, select the zone from the drop down list and click around the zone area till finished.
When done, click the 'Save Zone Coordinates ' button. If you then select another zone from the list, the zone you have just mapped will
display the zone colouring and label.
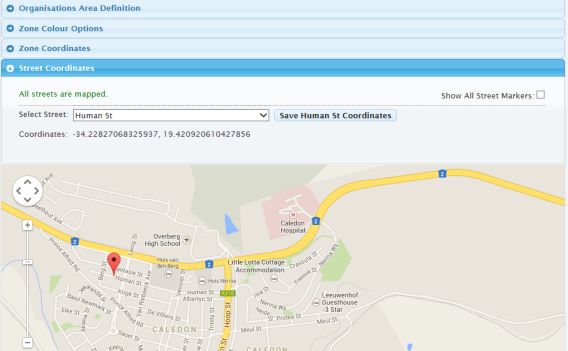
Street Coordinates
- The use of street coordinates is used for the mapping of criminal incidents for visual reports (functionality in development).
- In order to map each street, select it from the dropdown list, click a point in the street, preferably mid way in the
street and click the 'Save [street name] Coordinates' button.
Once the coordinate has been saved you will see a small green check
appear next to the coordinates of the street. Continue till you see the message that all streets are mapped.
- Figure 5